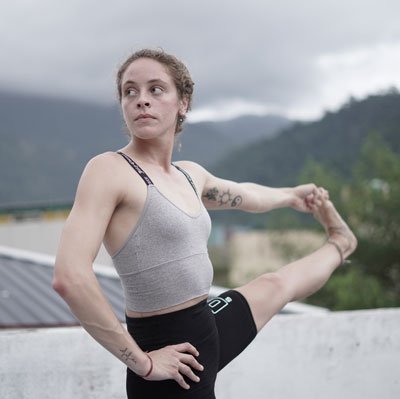
Utthita Hasta Padongusthasana (Extended Hand To Big Toes Pose)
What is Utthita Hasta Padongusthasana ?

Utthita Hasta Padongusthasana is an extended hand to big toe pose, which is a balancing pose. You have to lift one leg, and hold the big toe of the feet with your fingers. It is one of the most powerful poses, that can make you very powerful. You can build on your body’s strength and flexibility with the help of Utthita Hasta Padongusthasana. It pertains to your legs and ankles, as well. If you have very tight hamstrings, and cannot get your legs aligned in a straight line, along with a straight spine, then you must use a strap to practice this pose. You may also fall down, while trying to do the pose initially. But that is alright.
As with other asanas from the Ashtanga Primary series, you can trace its name to Sanskrit verses.
Utthita means “stretched,”
Hasta means “hand,”
Padangustha means “big toe,”
Asana, meaning “pose.”
Apart From the Ashtanga Vinyasa series, you can also find this being practiced in all other yoga styles. The Utthita Hasta Padongusthasana pose requires you to engage your core and the other muscles as well. You can do Utthita Hasta Padongusthasana quite easily, with some guidance from the teachers.
Read More: Why Is Kundalini Yoga Dangerous? The Truth About Its Risks and Rewards
How To Do The Asana?
You should do the asana initially, under the tutelage of an experienced teacher. The steps ate given below:
- You have to take your position in Tadasana.
- Lift one leg towards the front of your body, or the sides, by folding at the knee initially.
- Then, you have to stretch your hands, and hold the big foot. You have to grasp the big toe with the first two fingers of the active hand.
- You have to keep the other hand on your hips and also gaze at the same side.
- While doing this asana, you have to keep in mind that your sternal plate on the chest and the spine should be straight.
- Your hips should also be aligned with one another.
- You have to keep the torso in a straight line and the entire pose should look symmetrical from a distance.
- You can hold the breath for 1 minute or 5 counts.
- After you are done, exhale and then repeat on the other side.
Modifications and Variations
- Many beginners will not be able to reach the toes in the beginning. That is completely fine, and you do not have to be stressed. You can use a strap underneath your feet, and hold it with the hands, to gain the right pose. You can also do the asana or the pose with a bent knee initially. You can catch hold of the toe, but do not try to straighten the legs.
- You can also do the asana, while standing near a wall. You can use the wall for added support, lest you should fall. You can keep the arm on the wall, instead of on the hips.
- You can also do the asana or pose, by keeping your leg on the edge of the back of a chair. Place the chair a few inches away from the wall and do the needful.
As a variation, you can try the same pose, in a reclined manner. Lie down on the floor, and try to hold the big toe of one foot, with your hands parallel to the leg, and keep the other leg straight on the floor.
You can position your leg in front of you or on the sides. Do whichever feels comfortable.
You have to hold the asana for 5-10 breaths and gaze at the side, towards which your foot is directed. It is called Parsva Drishti, Left and Right Side.
Safety Precautions Decoded

When you are doing Utthita Hasta Padongusthasana asana or pose, you have to keep a few things in mind. Moreover, if you maintain the tips shared here, you will also save yourself from any sort of injury.
- Do not allow the pelvis to get raised on the side of the outstretched leg. You have to try to keep the pelvis straight and parallel to the floor, as much as possible. If it accidentally lifts, the raised leg rotates internally, and lead to instability of the hamstrings, pelvis and the hips.
- You should not slump, when you are in this pose. You have to engage the glutes to keep this from happening.
Follow these instructions, and you will gain from the benefits of this pose.
Who Can Do This Asana and Who Cannot?
If you have been practicing yoga asanas for a long time, doing this pose is a breeze for you. However, if you are just starting out, you have to warm up sufficiently well. You can do the asana, if you are of normal body constitution. Or else, you have to keep track of the contraindications mentioned here.
- You have to understand the movement mechanism the body in this pose: Do not exert excess pressure, if your body cannot take it.
- You might face an injury in the hips or the muscles in the legs. While this pose is good for improving the blood circulation and give a toned look to the entire leg, yet an injury can happen to the hamstrings, or the quadriceps or the calves. So, you should exercise precaution while doing this pose.
- If you are suffering from low blood pressure, the act of holding the breath or tightening your chest muscles can cause dizziness and headaches.
Read More: Everything You Need to Know About Kundalini Yoga Teacher Training
Benefits of Utthita Hasta Padongusthasana Pose
- The practice helps in the contraction of the muscles. So, you can expect to get a lot of benefits from the Utthita Hasta Padongusthasana pose.
- The practice of Utthita Hasta Padongusthasana pose also improves the balance with awareness. The awareness of the body along with the stimulation and contraction of the muscles helps to improve the posture and balance, as well.
- Your mind should travel with the body. With the improved awareness and balance, the concentration of the mind is improved.
- It lengthens the spine from the base, while keeping the hips square, and the pose ensure endurance with stability.
- It is a good pose for athletes. It is also good to add this pose to the routine for better looking legs which are strong at the hamstrings, quadriceps and calves.
- The pose improves the flexibility of the hips.
- This pose also maintain the firmness around the shoulders, while keeping the alignment with the ears and arms.
- This pose activates the joints.
- It reduces the symptoms of rheumatic disorder.