Prasarita Padottanasasna With Variations
What is Prasarita Padottanasasna?

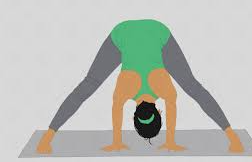
Prasarita Padottanasasna is an amazing hip opener asana, which is also an intense leg stretch pose. You can call it a beginner level forward-bending pose, whose main aspects are inversion and forward bend. It is a favorite of the Ashtanga School of Yoga. You can practice the base variation first, followed by the others.
Like all other Ashtanga Primary series asanas, you will also be able to trace its name to Sanskrit texts. The name etymology is as given underneath.
- Prasarita means ‘expanded’
- Pada means ‘feet’
- Uttana means ‘intense stretch
- Asana means ‘pose’
This is one of the asanas from the Ashtanga School which can give you immense flexibility and strength in a short while.
Read More: Why Is Kundalini Yoga Dangerous? The Truth About Its Risks and Rewards
Variation A of Prasarita Padottanasasna
How To Do The Prasarita Padottanasasna A?

You can do this asana after some practice. The body’s flexibility is of immense importance, if you want to do this asana today. Here the steps, through which you can achieve the posture.
- You have to start from the Tadasana. Slowly, stand with both feet apart.
- You have to stand in Akimbo pose.
- You should ground both your feet on the ground properly.
- Grasp and interlock both the hands’ fingers at the top of the head, and then move backwards.
- Inhale and then stretch your body properly. Exhale and fold the torso forward from the hip joints. Your back should be straight.
- You have to fold further and deepen the pose, and bring your head in contact with the floor. Slowly, support the upper part of the body on both hands, palms down and with the elbows jutting out.
- Breath normally.
- You can breathe 5-6 counts.
- To release the pose, you can walk your feet to stand beside one another and slowly lift the entire body with a swing. All this while, your feet should be firmly grounded and core drawn in, to avoid any exertion or muscle sprain.
Modifications
If you are doing this asana for the first time, you may have some difficulty bringing your hands to the ground, without hurting your lower back.
- So, you can keep two blocks on either side of the legs. Place your hands on both blocks.
- You can also try the pose with the help of a folded chair.
You have to breathe normally and hold the pose for 5 breaths in the final forward fold pose. Your gaze will be in between the eyebrows or Ajna Drishti.
Safety Precautions Decoded
- If you are doing the asana for the first time, you can place your feet wider than required, for more assistance, during the forward fold. However, it must not be too wide, as you may slip and fall.
- If you feel any sort of tightness in your knees or the lower back, then you should bend as much as your body allows you to.
- Moreover, you should exit from this pose very slowly, as it could lead to dizziness.
- Awareness is very essential for you to do this pose. You can concentrate on the knees to make it perform the way you want to. You can also bend them slightly.
- You should also ensure that you are not rounding the spine, to reach the ground, from the hips.
- Always perform the asana initially, with the help of your classmates or the teacher. It will be easier, as they can provide you with some support under the belly.
Who Can Do This Asana and Who Cannot?
If you have been doing asanas for a long time, you can do this asana quite easily. In other cases, you can read the contraindications and act accordingly.
- If you have injuries in the neck, shoulders, wrists, hips, ankles and legs, then you should refrain form practicing this asana. If you had any surgery in these body parts, then also the same thing applies.
- If you have problems practicing asanas, with the help of your breath, then this pose will prove to be counter productive
- If you have high blood pressure, vertigo, and migraine, can do this pose.
- All those who have hernia of spondylitis, must also avoid this pose.
- Anyone who has undergone heart surgeries, must also avoid this pose.
- Old people and expectant mothers also cannot do this pose or asana.
Benefits of Prasarita Padottanasasna and Its Variation
The asana or pose has some great benefits on the body. They are:
- It strengthens and also stretches the inner as well as back leg muscles.
- It also tones the abdominal muscles.
- You will feel a rush of fresh blood to the brain, which actually provides calmness.
- It can also help to reduce your back pain.
- It also relieves headache.
You will be amazed to know that there are 4 variations of this pose in the Ashtanga Primary series: A, B, C, and D versions.
Variation B of Prasarita Padottanasasna
Prasarita Padottanasasna Variation B – Steps To Do
- In the variation B, you have to stand with your feet hip-width apart.
- Place the hands on the hips, and elongate the spine.
- Exhale and then bend forward.
- Bring the head’s crown in contact with the floor. Draw out the shoulders away from the years.
- Hold the pose, while taking slow breaths.
- You can release the pose by coming up, with an inhalation.
- Then you can exhale and stand in Tadasana again. Release both the hands.
Variation C of Prasarita Padottanasasna
Prasarita Padottanasasna Variation C – Steps To Do
- You have to start with the asana from Tadasana, from which you spread the legs.
- The legs should be hip-width apart.
- All this while you have to maintain stability and ground yourself properly.
- You have to engage your thighs and lift them up.
- Interlock the fingers of both the hands at the back.
- The hands should be held straight at the back.
- You have to elongate the spine and open the chest.
- Widen the shoulders and bend forward with an exhalation. You have to ensure to keep the spine straight.
- Bring the head in contact with the floor, and stretch the hands backwards more.
- Stay in the pose for a minimum of 5 breaths.
- To release yourself from the pose, inhale and move upwards. You have to move back to the Tadasana pose.
Read More: Everything You Need to Know About Kundalini Yoga Teacher Training
Variation D of Prasarita Padottanasasna
Prasarita Padottanasasna Variation D – Steps To Do
- You have to start the asana in the same way as the last three. That is in Tadasana.
- You have to stand with your feet hip-width apart.
- Ground the lower edges of the sole on the ground. And, uplift the thigh muscles.
- You have to elongate the spine and open the chest muscles.
- Your hands should be on the hips.
- Fold forward from the hip joint, while keeping the hands under the shoulders for support. You can take some deep and short breaths in this pose.
- Exhale and go deeper into the pose, and then move the hands to the feet, and hold the big toes with the middle fingers, index fingers and thumbs, while jutting the elbows outwards.
- You can release the head down on the floor.
- Maintain the pose for a minimum of 5 breaths.
- To come out of the pose, you have to walk the hands to the initial location, below the shoulders, and then inhale.
- Place the hands on the hips, and exhale. Come back straight upwards, and stand in Tadasana.
- Release the hands.
Deepen Your Yoga Practice with Hari Om Yoga Vidya School
Located in the heart of Rishikesh, Hari Om Yoga Vidya School is a place where ancient yogic wisdom meets modern teaching techniques. As a top yoga school in Rishikesh, we are committed to providing authentic, immersive yoga education in a peaceful, spiritual setting. Recognized as one of the best yoga schools in Rishikesh, we offer structured training programs designed to help you evolve in your practice, whether you are a beginner or an experienced yogi.
If you’re searching for a yoga school in Rishikesh that focuses on holistic learning, experienced teachers, and a supportive community, look no further!
Explore Our Yoga Teacher Training & Retreats
At Hari Om Yoga Vidya School, we offer a range of courses tailored for different levels of practitioners:
✅ 100-Hour Yoga Teacher Training in Rishikesh – A foundational course for those looking to begin their yoga journey.
✅ 200-Hour Yoga Teacher Training in Rishikesh – An internationally recognized certification for aspiring yoga teachers.
✅ 300-Hour Yoga Teacher Training in Rishikesh – Advanced training to deepen your practice and refine your teaching skills.
✅ 7-Day Yoga Retreat in Rishikesh – A rejuvenating escape into yoga, meditation, and self-discovery.
✅ 10-Day Yoga Retreats in Rishikesh – A transformative experience that blends yoga, relaxation, and Himalayan serenity.
Join us for a life-changing experience and become part of our global yoga family! 🌿✨


