Marichasana With A, B, C, D Variations
What is Marichasana?

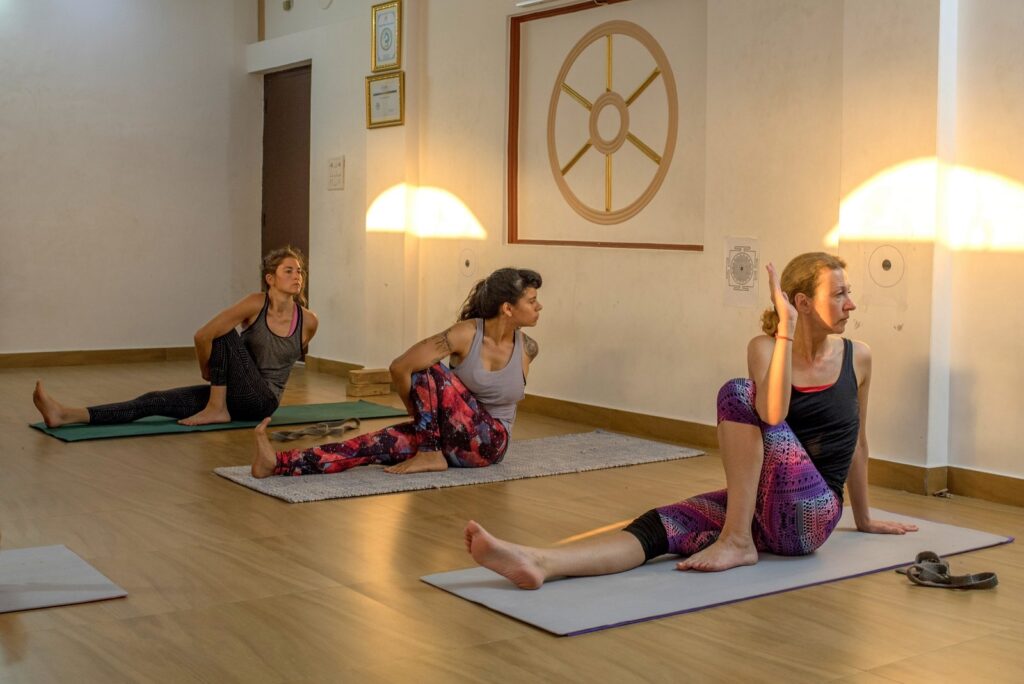
Marichasana is a pose or asana in the Ashtanga Primary series. It is a combination of the hip opener asana, along with hamstrings and waist muscles loosener. You have to combine it with the Janusirsasana. After you do the variation A, you can do the variations B, C, and D. The advanced versions require a lot more twisting and folding, than this version. The name has been dedicated to Rishi Marichi, considered as one of the sons of Lord Brahma.
You can trace the name etymology to Sanskrit verses.
- Marichi means ‘ray of light’
- Asana means ‘pose’
You will find this asana to be very enlightening in nature. It has a lot of physical benefits, but along with it, there are many mental benefits of practicing this asana on a regular basis. If you practice this asana on a regular basis, you will welcome more vitality and endurance in your life.
Read More: Why Is Kundalini Yoga Dangerous? The Truth About Its Risks and Rewards
Modifications
You can practice a few modifications to make it easy for you. They are as given below:
- If you are a beginner, then you may find it difficult to hold your hands behind your back. In that case, you should not force your body much. You can do as much is possible.
- On the other hand, you can also hold a strap in one hand and hold the other end of the strap with the other hand.
- Keep a folded blanket under the buttocks, to give you some comfort. It will also help you to keep the hamstrings in control. Your spine and shoulders will also develop greater flexibility.
You have to breathe slowly but deeply, with alternate breathing and hold the pose for 5 breaths in the final pose. Your gaze should be on your nose, or Nasagra Drishti.
Safety Precautions Decoded
Beginners are bound to make mistakes, while doing the asana. So, it is apt that you keep a few things in mind.
- Do not allow the torso to float to one side, but try to keep it aligned in forward direction.
- Do not try to rush into the pose, but maintain the integrity of the spine.
- Do not try to follow the binding pose of the hands, but be content with wrapping the hands around the legs initially.
- You can try to deepen the pose, by holding the wrist with the hand.
Who Can Do This Asana and Who Cannot?
If you have been doing asanas for a long time your body will be flexible as well as supple, However, you may have body issues and may also be a beginner. In that case, you need to check the below contraindications.
- You should not do Marichasana, if you have back or shoulder injuries. Moreover, you cannot do Marichasana, if you recently had any surgery in the above parts.
- If you have hamstring injuries, then also you should refrain from doing Marichasana.
- If you are suffering from diarrhoea like stomach ailments, you must not do Marichasana.
- You cannot practice this asana, if you have chronic Asthma.
- Always maintain your comfort levels, while doing the asana.
Benefits of Marichasana
You will gain very strong benefits, if you do this asana on a regular basis.
- After you have practiced this asana for quite some time, you will start seeing its benefits on the abdominal organs. Your liver and kidneys will start performing well.
- It also tends to calm and relax the body.
- The asana also tends to remove anxiety.
- It is a great asana for menstrual cramps.
- This asana will also help you to develop strong shoulders and spine.
- The asana is very effective in treating Sciatica pain.
How to do Marichasana Variations A.B. C.D?
Steps of Marichasana A
This is one of the asanas or pose, which is only found in the Ashtanga Primary series. So, you may not have ever practiced it, in any other form. So, you have to perform the asana under a learned teacher.
- You have to start from the staff pose or Dandasana, with your legs stretched in front of you. You have to breathe very slowly.
- Bend the right leg at the knee, and place its sole on the ground beside the left hip/ thigh.
- Your left leg should be left in a straight position. But you have to flex it properly, so that the heels are also grounded. Push the big toe a bit to the front, as it will help you to align your overall pose.
- Exhale and turn your body towards the left, and bend forward so that the chest faces the right side of the body. The right shoulder should press against the right knees.
- Now, take your right hand back by wrapping it around the right knee, toward the back. Do the same with the left hand.
- Interlock all the fingers of your hands at the back.
- You should maintain the pose for 5-6 breaths at least, to gain the maximum benefits.
- Then, free your hands slowly, and then keep both hands beside the thighs.
- Straighten the spine, and also stretch the legs again toward the front.
- You have to repeat the same asana on the other side.
Steps of Marichasana B
- It is the second asana in the series, of twisting, binding, and folding asanas.
- You can start from the Dandasana pose as above, and then fold the right leg at the knees, and bring the feet on the left side of the body. Inhale while you do this.
- Thereafter, you have to bend the left leg at the knees, and keep it upright in front of your body.
- Exhale and fold forwards, while bring the left arm pit in front of the left shin.
- Wrap the left arm around the left leg, and take it to the back. At the same time, you have to bring the right hand back as well, and hold the hands in a grasp.
- Inhale and look upwards, while opening the muscles of the shoulders and chest.
- Exhale and deepen the fold, and try to bring you chin contact with the floor.
- Breathe deeply but slowly.
- Inhale and try to look upwards in front of you.
- To release, bring the hands forward, and release the legs, and relax. Then you can try it on the other side.
Steps of Marichasana C
- You have to start in staff pose, or the Dandasana as usual. Then you have to bend the right leg and place the feet on the left knee.
- Take the right arm behind and place it on the place behind the hips. Then, straighten your spine.
- Breathe in and take your left arm back, while rotating a bit toward the right. And also wrap the right arm from outside the folded right leg, and take it back. Try to bring both hands in contact with one another, and bind them.
- Try to look backwards, over the right shoulder.
- You can breathe deeply and take 5-6 breaths.
- With each inhalation, you have to elongate the spine.
- Release and repeat on the other side.
Read More: Everything You Need to Know About Kundalini Yoga Teacher Training
Steps of Marichasana D
- You can start the asana in the half-lotus position, where the right feet can be placed on the left thigh.
- Then you have to bend the left leg and keep the sole in front of the hip, as close as possible.
- Exhale and bring the right arm around the left knee, and bring the left arm behind the back, to link the hands with fingers or hold wrist.
- Inhale and elongate the spine, focussing on twisting the ribs. Open the shoulders and chest, and look over the left shoulder.
- You have to hold the pose as before.
- Release and repeat the same on the other side.
Deepen Your Yoga Practice with Hari Om Yoga Vidya School
Located in the heart of Rishikesh, Hari Om Yoga Vidya School is a place where ancient yogic wisdom meets modern teaching techniques. As a top yoga school in Rishikesh, we are committed to providing authentic, immersive yoga education in a peaceful, spiritual setting. Recognized as one of the best yoga schools in Rishikesh, we offer structured training programs designed to help you evolve in your practice, whether you are a beginner or an experienced yogi.
If you’re searching for a yoga school in Rishikesh that focuses on holistic learning, experienced teachers, and a supportive community, look no further!
Explore Our Yoga Teacher Training & Retreats
At Hari Om Yoga Vidya School, we offer a range of courses tailored for different levels of practitioners:
✅ 100-Hour Yoga Teacher Training in Rishikesh – A foundational course for those looking to begin their yoga journey.
✅ 200-Hour Yoga Teacher Training in Rishikesh – An internationally recognized certification for aspiring yoga teachers.
✅ 300-Hour Yoga Teacher Training in Rishikesh – Advanced training to deepen your practice and refine your teaching skills.
✅ 7-Day Yoga Retreat in Rishikesh – A rejuvenating escape into yoga, meditation, and self-discovery.
✅ 10-Day Yoga Retreats in Rishikesh – A transformative experience that blends yoga, relaxation, and Himalayan serenity.
Join us for a life-changing experience and become part of our global yoga family! 🌿✨


